Adding and Editing Retail Agencies in BindHQ
Last updated: June 24, 2026
This article explains how to add new retail agencies to BindHQ.
Adding a New Retail Agency
Create a New Retail Agency
Navigate to Partners on the left side bar. The system should default to the top section for "Insureds & Agents".
Below Retail Agencies, click Create New Retail Agency.
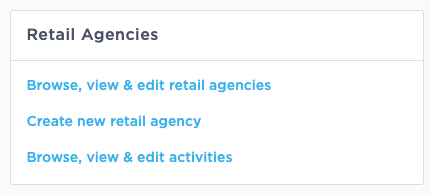
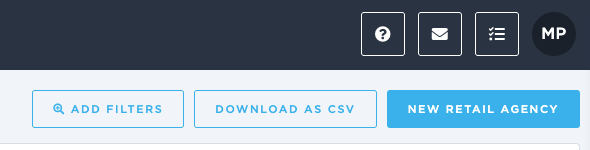
You can also select "Browse, view & edit retail agencies" and then click "New Retail Agency" in the upper right corner.
Adding or Editing Agency Details
You can access the Agency Details page using either of the above methods. In addition, you can click the agency’s blue-linked name directly from a policy or application screen.
From the Agency Details page, complete or edit the agency profile by filling in these sections:
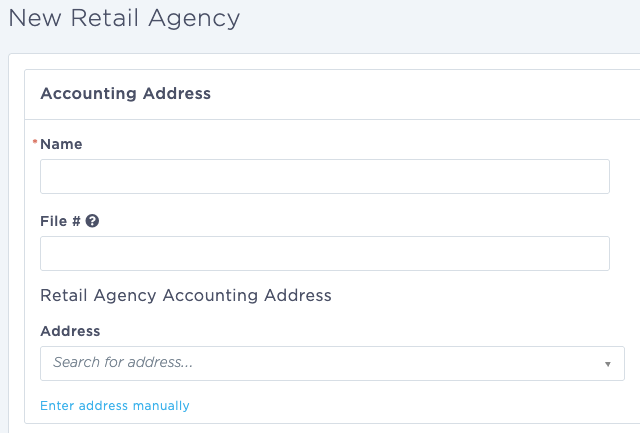
Accounting address
Name: Retail agency name
File # (optional)
Retail Agency Accounting Address: Use the Google lookup provided to find and select the address from the dropdown. If not available, click "Enter address manually".
Location Address: Check the box to use the accounting address, or uncheck the box and repeat the lookup or manual entry process.
Mailing Address: Check the box to use the accounting address, or uncheck the box and repeat the lookup or manual entry process.
Contact Add your primary contact's information.
Phone
Fax
Email
URL
Bank Details
Bank (select from banks in BindHQ. If you can't find the bank you need, contact your accounting admin.)
Bank Account Number
Agency Intelligence: (Optional) Fill in any background details on the agency
LinkedIn Company Page
Types of Lines
Agency Type
Potential Competition
Year Founded
Number of Employees
Agency Annual Revenue
Number of Policies bound per year
Administration:
Accounts current? (check to indicate this agency's accounts are current)
Parent: If needed, select a parent agency
Bill to Parent: If a parent agency exists, use this check box to indicate that billing should go to the parent and not this agency record.
Users - Add BindHQ users associated with the agency and select the coverage they have with the agency (default, P&C, auto, or personal).
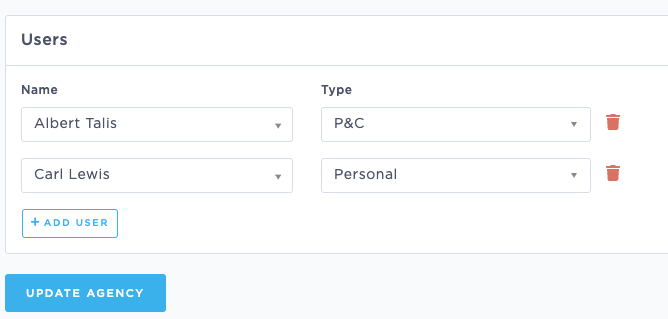
NOTE: If you're creating a new agency, you'll need to click the blue "Create Agency" button to create the agency. Once that's done, the Compliance tab will be available.
Compliance Section
The Compliance tab stores key regulatory and legal details for each agency. This includes:
E&O Coverage – Enter the agency’s Errors & Omissions policy number and expiration date to track compliance with required professional liability insurance.
Tax Information – Capture the agency’s tax ID and configure 1099 tracking if applicable.
Business & Legal Info – Record the agency’s legal business type and name.
State Licenses – Maintain license numbers, expiration dates, and state of issue. Residency can also be flagged.
Additional Info – Track important dates like creation date or agreement date for audit and record-keeping.
Status Controls – Manage whether the agency is authorized to quote, bind, or if it should be set to inactive.
Agency Status in BindHQ
OK to quote?
This setting determines whether the agency can have quotes generated for it. If checked, users can generate quotes for new or renewal business with this agency. If unchecked, quoting is disabled.
OK to bind?
This setting controls whether the agency can actually bind coverage. If checked, they can move policies from quoted to bound status. If unchecked, they may still be able to quote, but cannot bind new policies.
Set agency to inactive
When an agency is set to inactive, it is fully restricted from binding any new business. This is typically used if the relationship has ended, compliance is incomplete, or the agency should no longer transact. Existing bound business remains unaffected, but no new quotes can be converted to policies.
Last Update: June 2026