Navigating the Accounting General Tab
Last updated: July 5, 2025
Perform accounting actions and record transactions in BindHQ through the functions in the Accounting General Tab
Applies to:
- Accounting
Last Updated: June 2024
Watch our training video or read through this article to learn how to find and navigate Accounting features in BindHQ.
There are eight sections to this article
- Navigating the Accounting General tab
- Accounts Receivable
- Accounts Payable
- Journals
- Bank
- Suppliers
- G/L Account Admin
Video Walkthrough
Navigating the Accounting General Tab
- Select Accounting from the sidebar navigation to access all of BindHQ’s accounting capabilities.
- Accounting is divided into the General and Reports tabs.
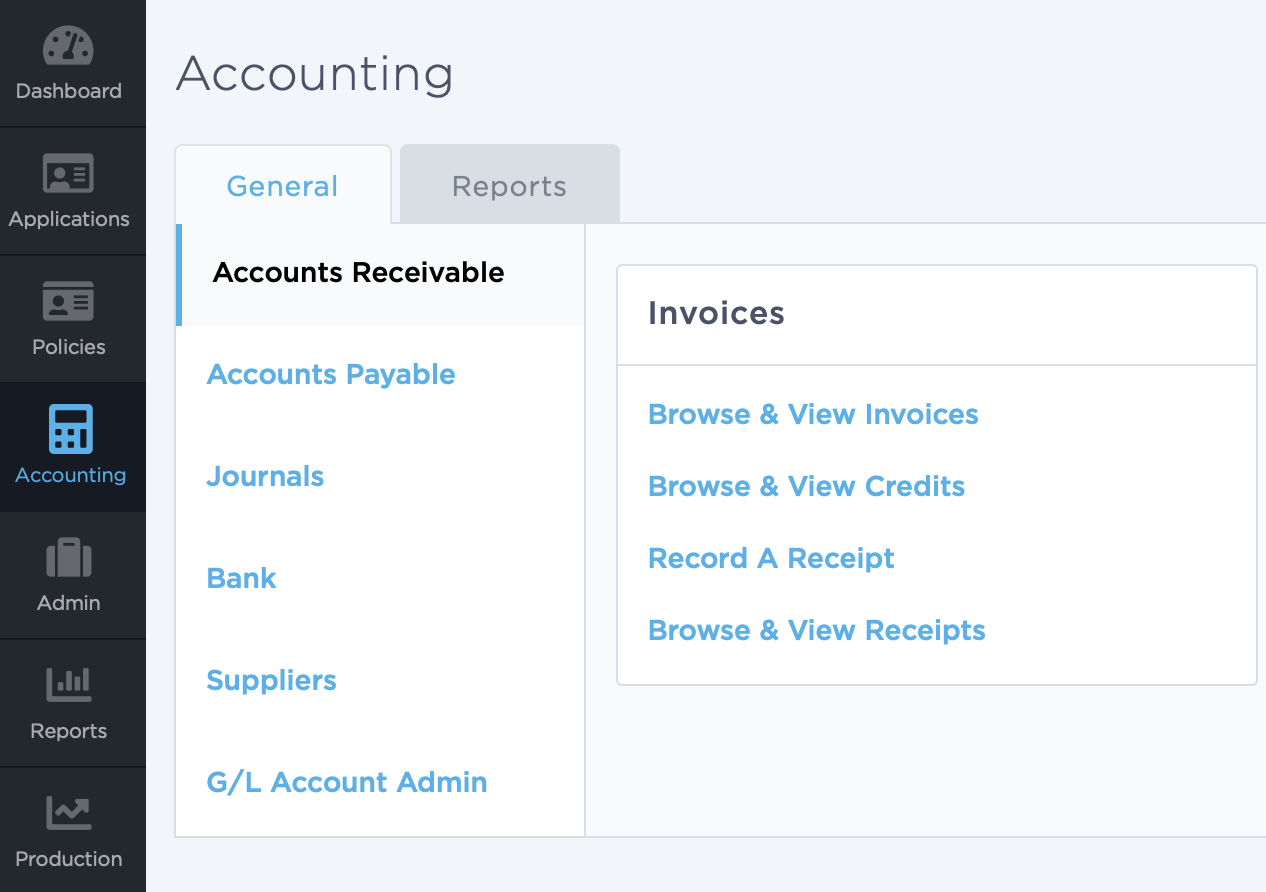
The General tab includes the following subsections:
- Accounts Receivable
- Accounts Payable
- Journals
- Bank
- Suppliers
- G/L Account Admin
Accounts Receivable
This subsection lets users record receipts and view invoices using the following options:
-
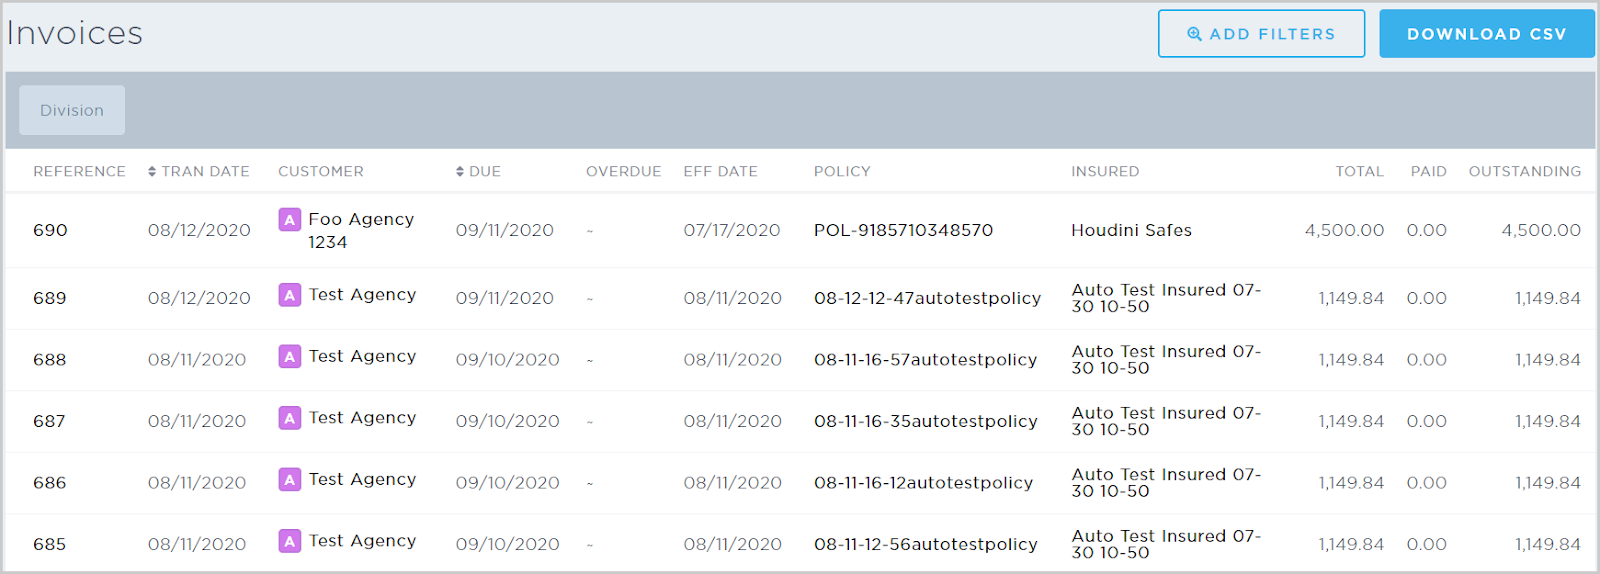
Browse & view invoices - View all invoices created as part of the binding process on the policy side. From the Invoices page, you can select the Invoice #, Customer, Policy #, or Insured hyperlinks. You can also filter by division, payee, dates, and status (open or overdue). To download a filtered view, click Download CSV.
-
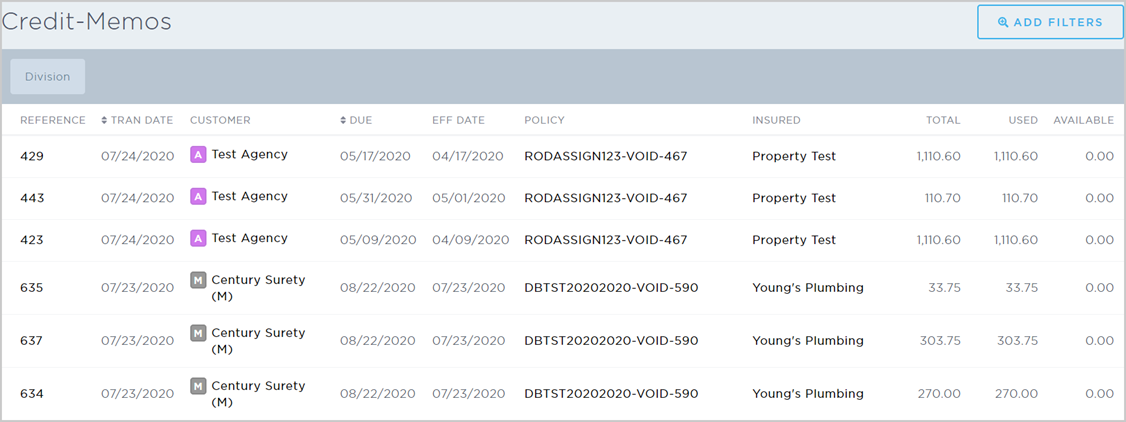
Browse & view credits - View all credits in the system. From the Credit Memos page, you can select the Invoice #, Customer, Policy #, or Insured hyperlinks. You can also filter by division, payee, open credit, and transaction dates.
-
Record a receipt - Start a new receipt by selecting the customer, setting the default filters (by policy or insured), and setting a date range.

-
Browse & view receipts - View all receipts in the system. From the Receipts page, you can select the Reference or Customer hyperlinks. You can also filter by division, customer, void status (voided, not voided, or all), status (open, applied, or all), and transaction dates. To download a filtered view, click Download and select a summary or detailed CSV. To record a receipt from this page, click Record Receipt.

For more details, see our articles on Accounts Receivable and recording receipts and deposits.
Accounts Payable
This subsection lets users create bills, make payments, and create a new tax reconciliation using the following options:
-
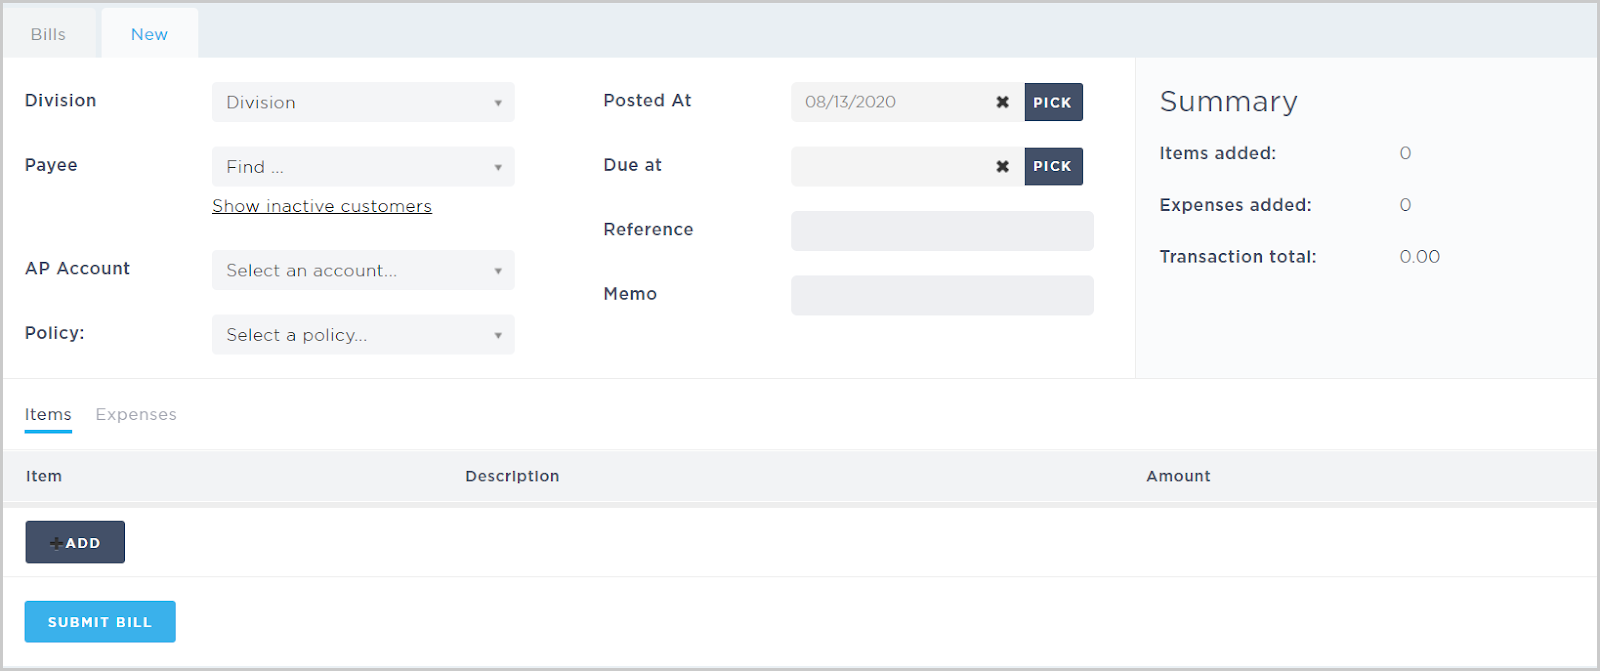
Create a new bill - Start a new bill by filling in the bill details and adding items or expenses associated with the bill.
-
Browse & view bills - View all bills in the system. From the Bills page, you can click the Invoice #, Customer, Policy #, or Insured hyperlinks. On the far right, you can click the ellipsis icon ("...") to view a bill’s details or pay a bill. You can also filter by division, payee, open status, and transaction date.

-
Create a new bill credit - Start a new bill credit by filling in the credit details and adding items or expenses associated with the credit.

-
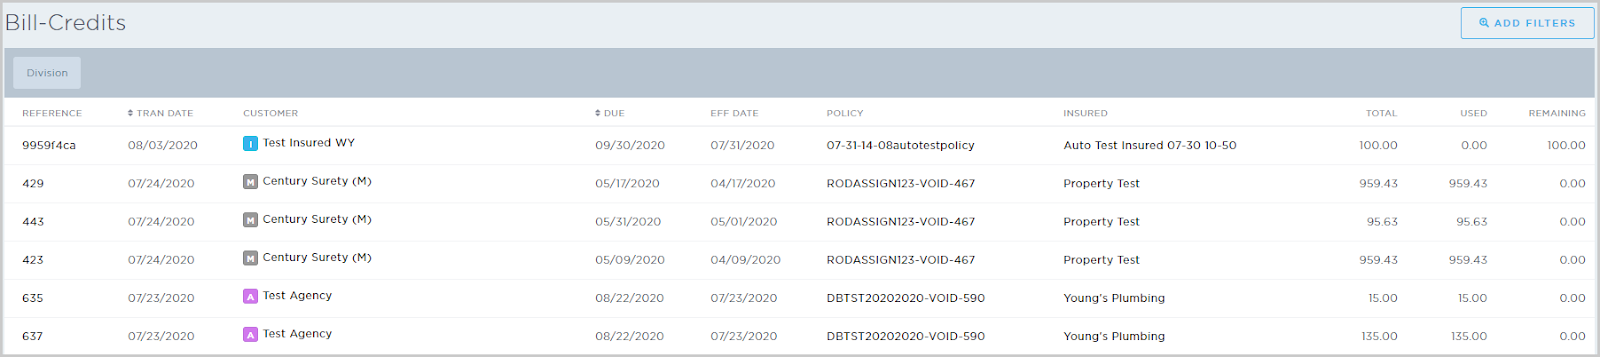
Browse & view bill credits - View all bill credits in the system. From the Bill-Credits page, you can click the Reference, Customer, Policy #, or Insured hyperlinks. You can also filter by division, payee, open status, and transaction date.
-
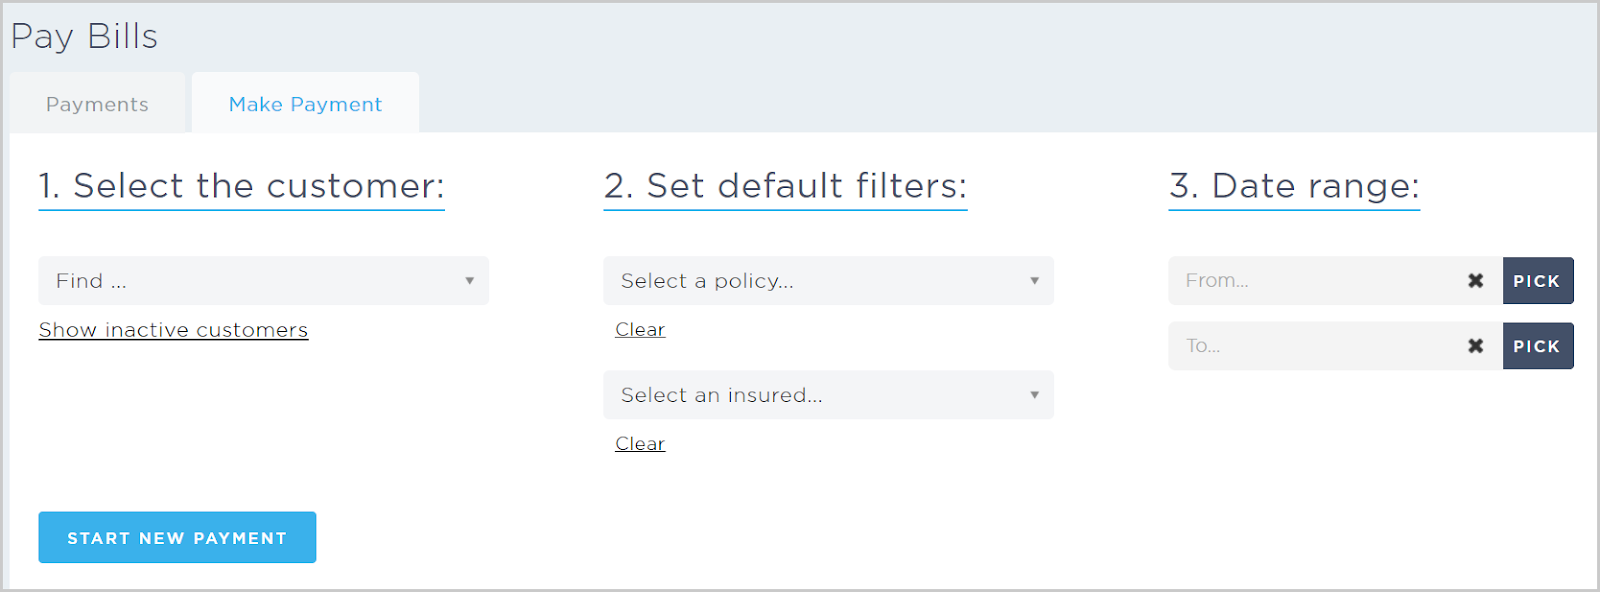
Make a new payment - Start a new payment by selecting the customer, setting default filters (by policy or insured), and setting a date range.
-
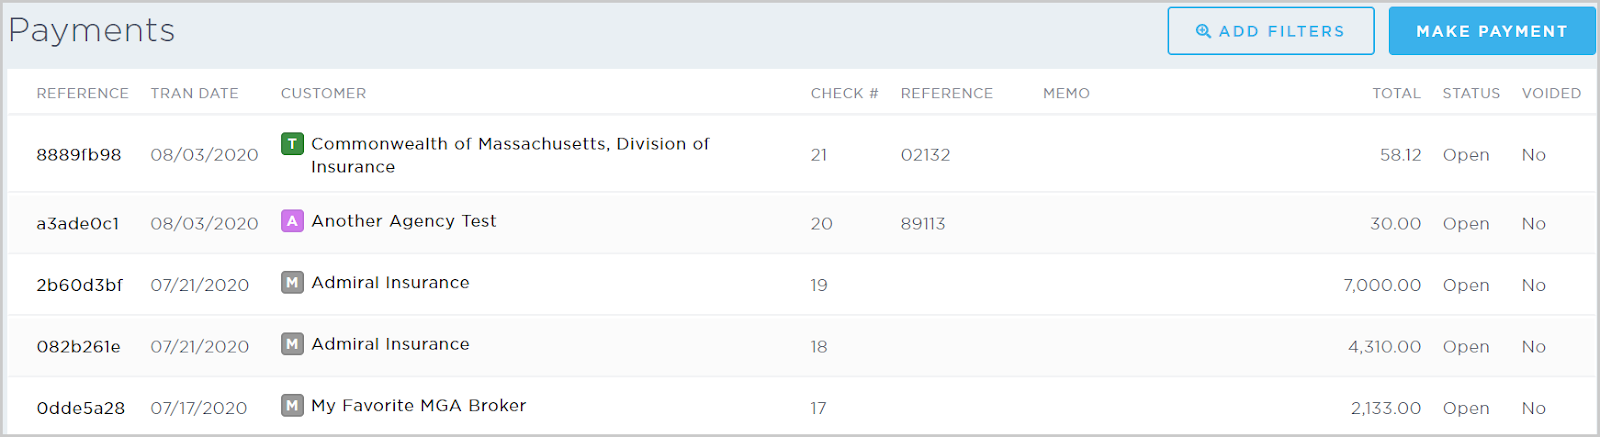
Browse & view payments - View all payments in the system. From the Payments page, you can click the Reference or Customer hyperlinks. You can also filter by division, customer, or void status (voided, not voided, or all). To make a new payment from this page, click Make Payment.
-
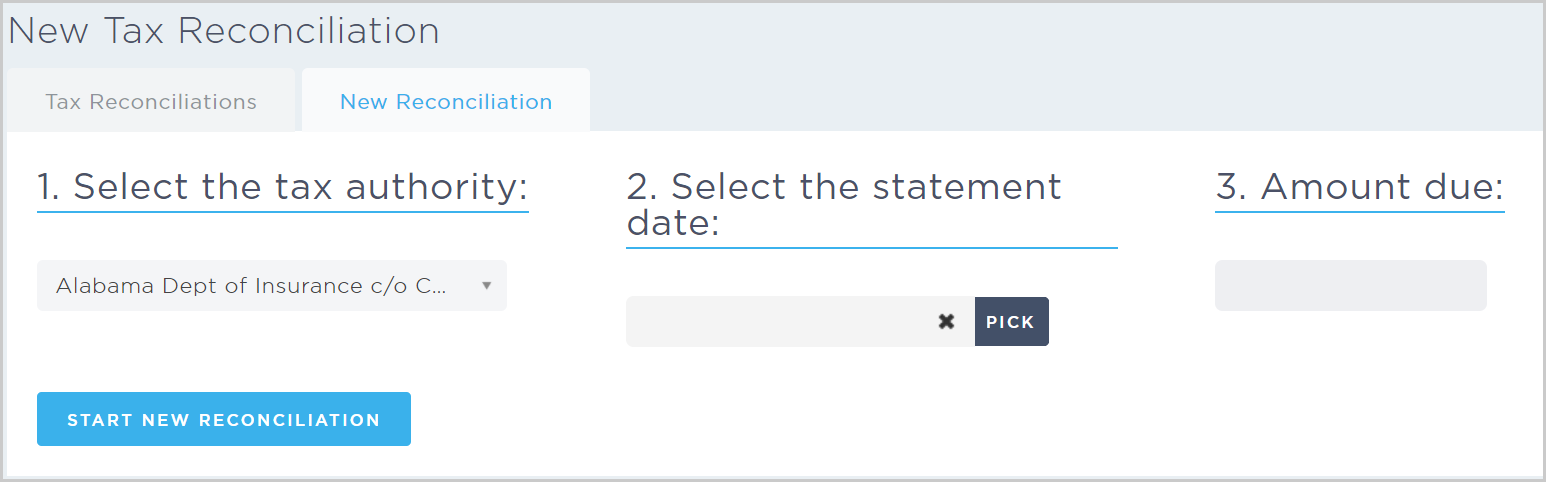
New tax reconciliation - Start a new tax reconciliation by selecting the tax authority and statement date, then entering the reconciliation amount.
-
Browse & view tax reconciliations - View all tax reconciliations in the system. On the far right, you can click the ellipsis icon to view a reconciliation’s details.For more details, see our Accounts Receivable article.

Journals
This subsection lets users add journal entries using the following options:
-
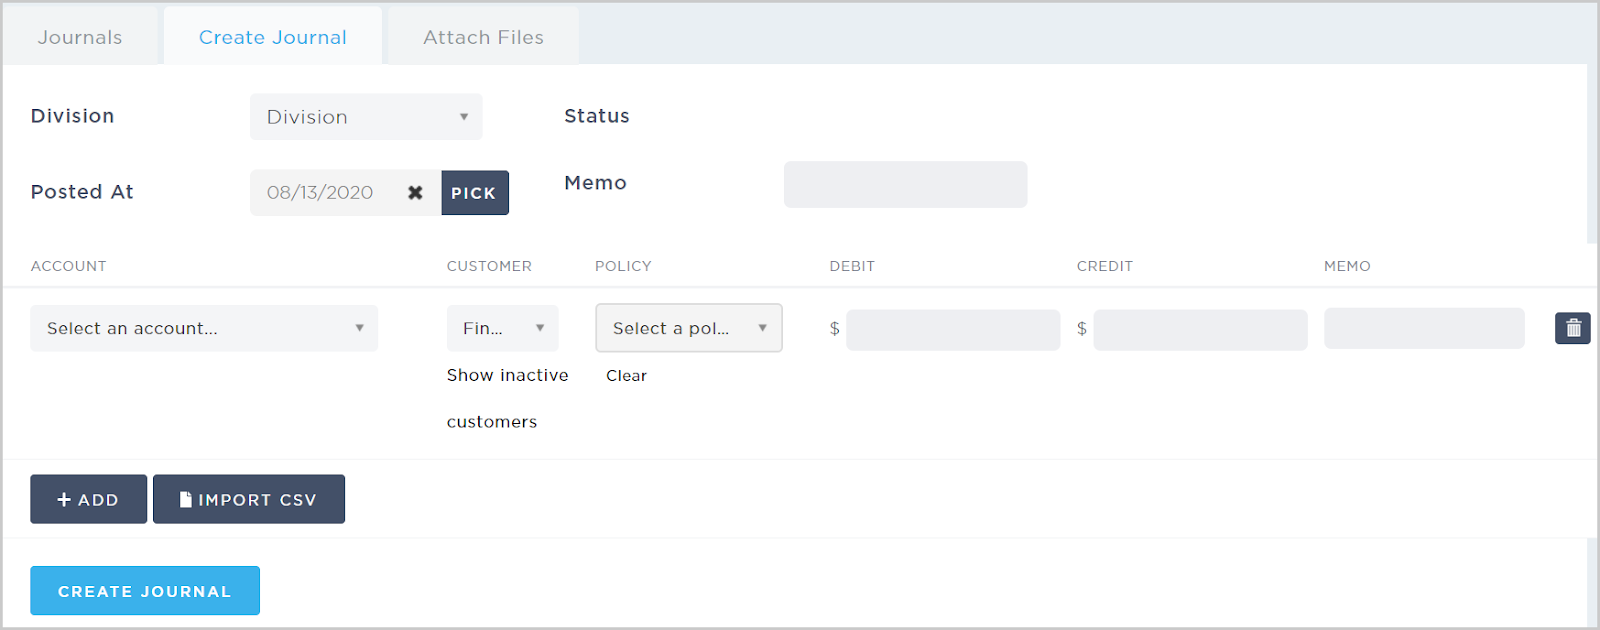
Create a new journal - Start a new journal entry by filling in the journal details. You can enter journal line items manually by clicking Add or by clicking Import CSV and uploading a CSV that contains the entry’s line items.
-
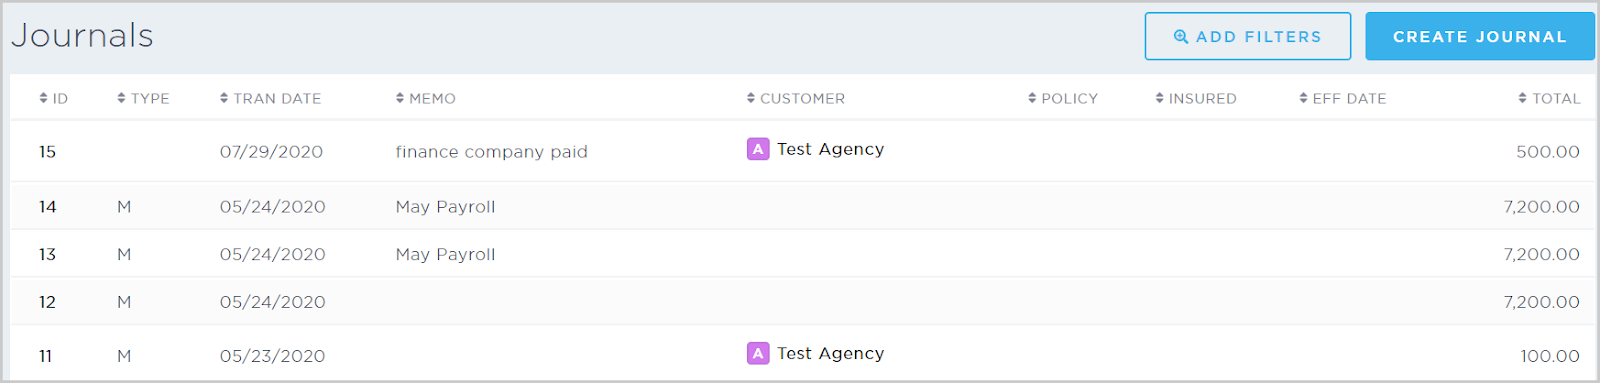
Browse & view journals - View all journals in the system. From the Journals page, you can click the ID or Customer hyperlinks. You can also filter by user, transaction ID, manual entries, and transaction dates. To create a new journal from this page, click Create Journal.
-
Browse & view offsets - View all offsets in the system. From the Offsets page, you can click the Reference or Customer hyperlinks. On the far right, you can click the ellipsis icon (...) to view an offset’s details. You can also filter by division or customer.
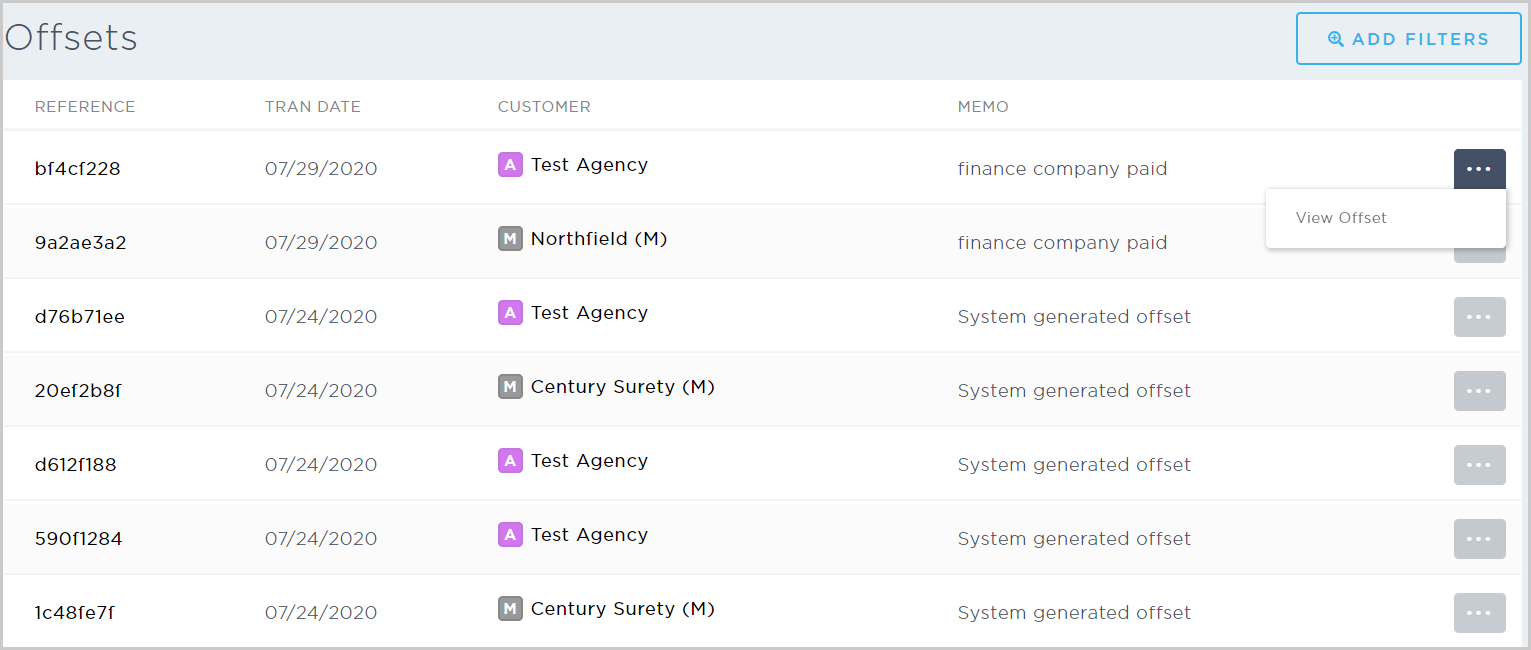
Note: The system auto-generates offsets when a policy is voided and has not been paid.
-
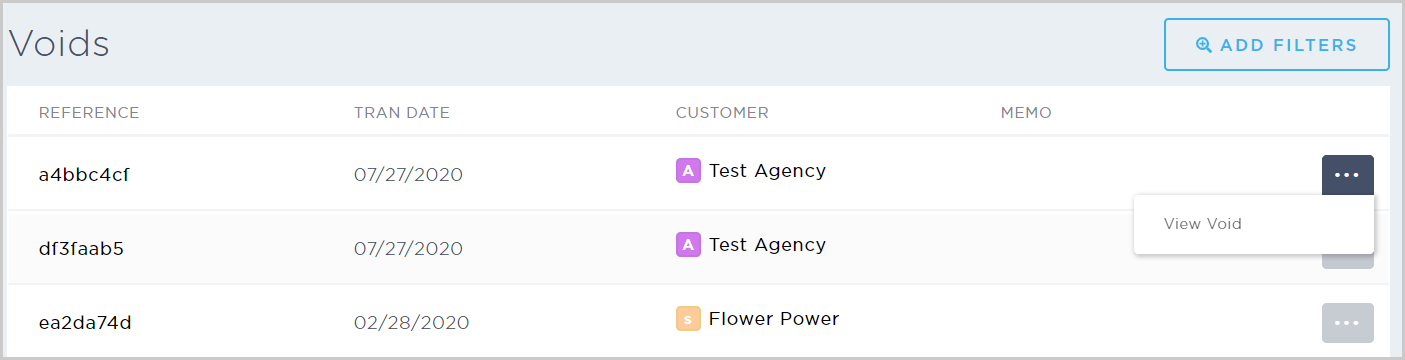
Browse & view voids - View all voided journals in the system. From the Voids page, you can click the Reference or Customer hyperlinks. On the far right, you can click the ellipsis icon (...) to view a void’s details. You can also filter by division or customer.
For more details, see our article on Creating Journals.
Bank
This subsection lets users record deposits and manage bank accounts using the following options:
-
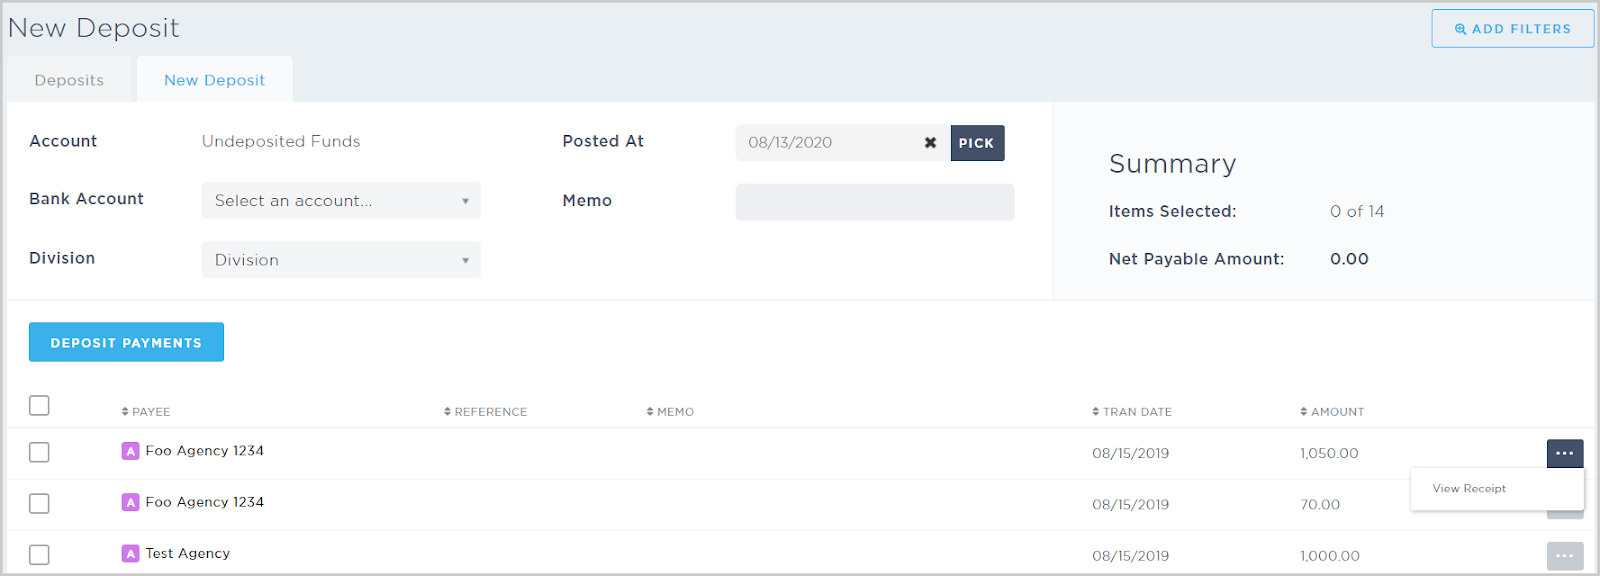
Record a deposit - Start a new deposit by filling in the deposit details and selecting one or more payments to deposit. On the far right of a payment, you click the ellipsis icon (...) to view a receipt.
-
Browse & view deposits - View all deposits in the system. From the Deposits page, you can click the Deposit reference number hyperlink to view a deposit’s details. You can also filter by division, payee, or transaction dates. To download a filtered view, click Download and select a summary or detailed CSV. To start a new deposit from this page, click New Deposit.

-
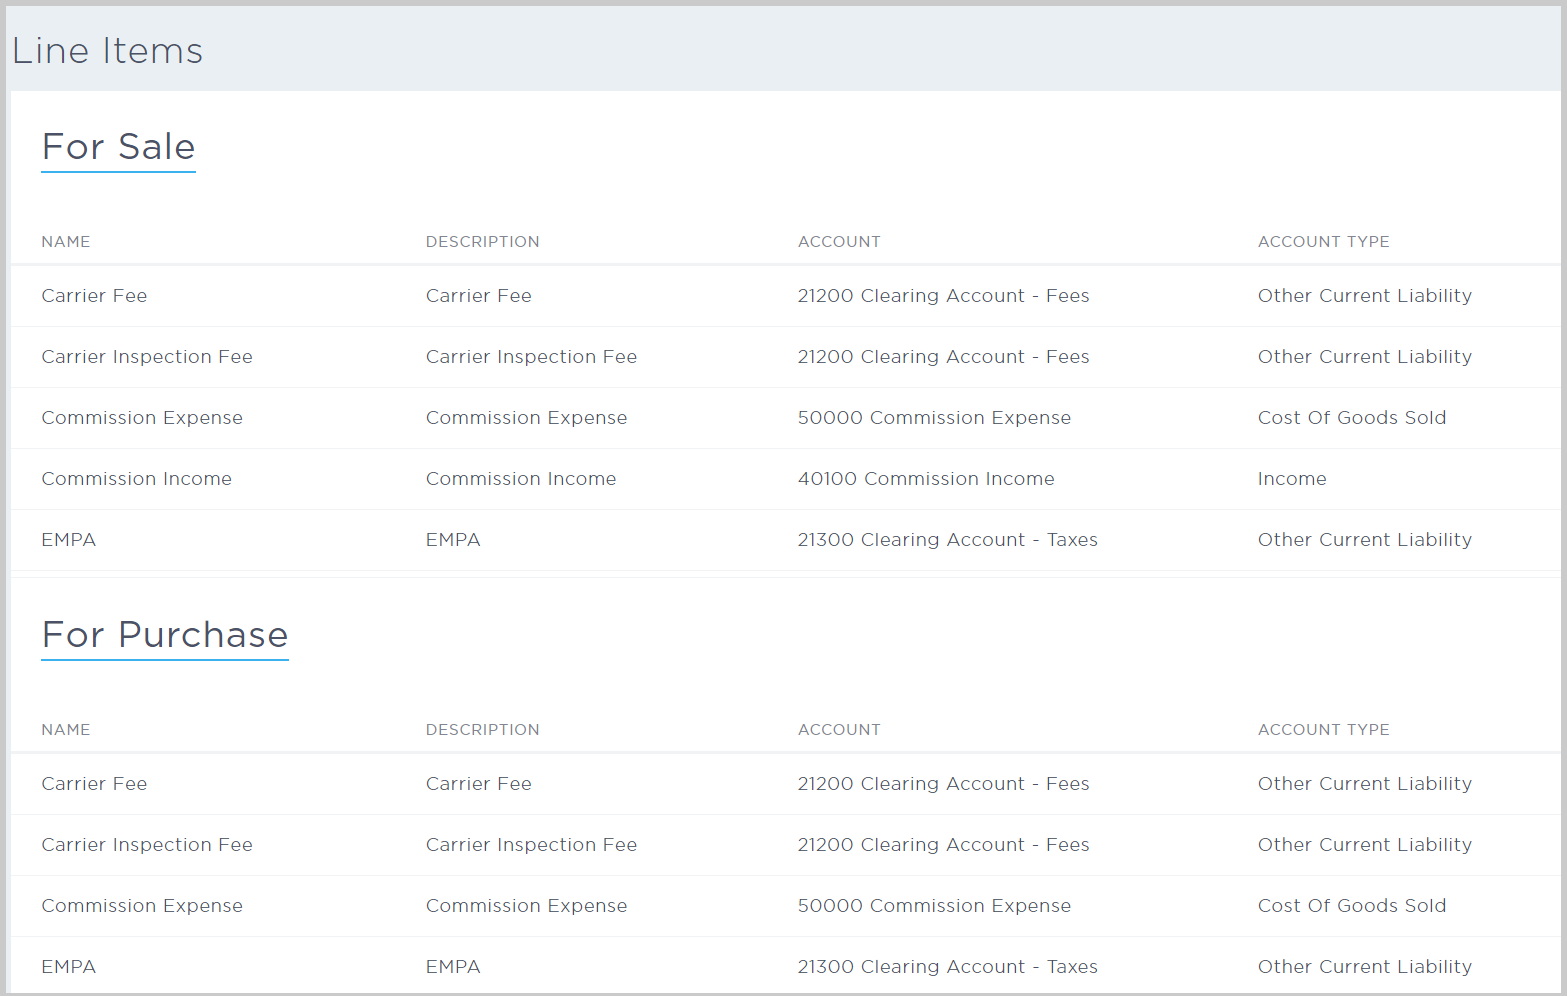
Browse & view line items - View the line items that display on transactions (for example, invoices or bills). The For Sale section is for AR transactions, while the For Purchase section is for AP transactions. Each line item displays the transaction’s name, description, account, and account type.
-
Browse & configure banks - View all banks configured in the system. On the far right, click the ellipsis icon (...) to edit a bank’s details. To create a new bank from this page, click New Bank.

-
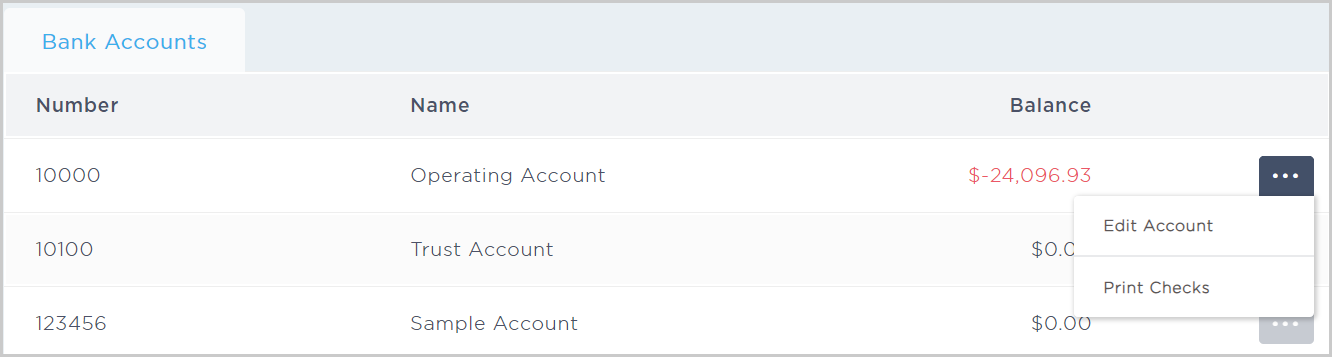
Browse & configure bank accounts - View all bank accounts configured in the system. On the far right, you can click the ellipsis icon (...) to edit an account or print checks.
-
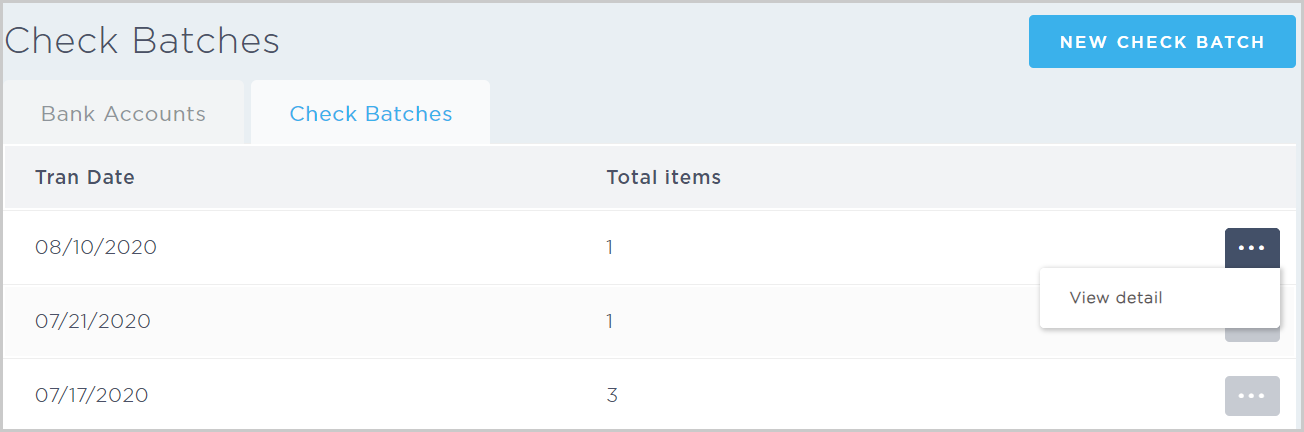
Browse & view check batches - View all check batches in the system. On the far right, you can click the ellipsis icon (...) to view a check batch’s details. To run a new check batch, click New Check Batch.
-
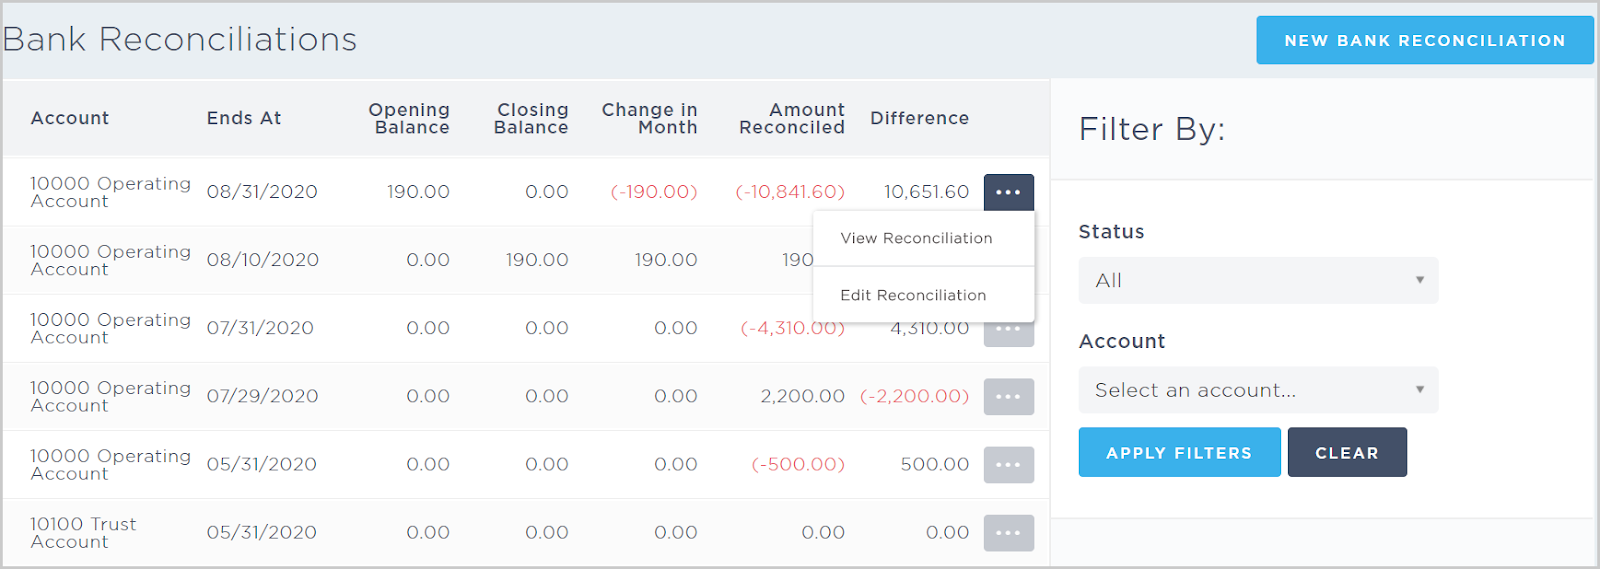
Browse & view bank reconciliations - View all reconciliations in the system. On the right, you can click the ellipsis icon (...) to view a reconciliation’s details or edit a reconciliation. On the far right, you can filter by status (finished, unfinished, or all) and account. To start a new bank reconciliation from this page, click New Bank Reconciliation.
-
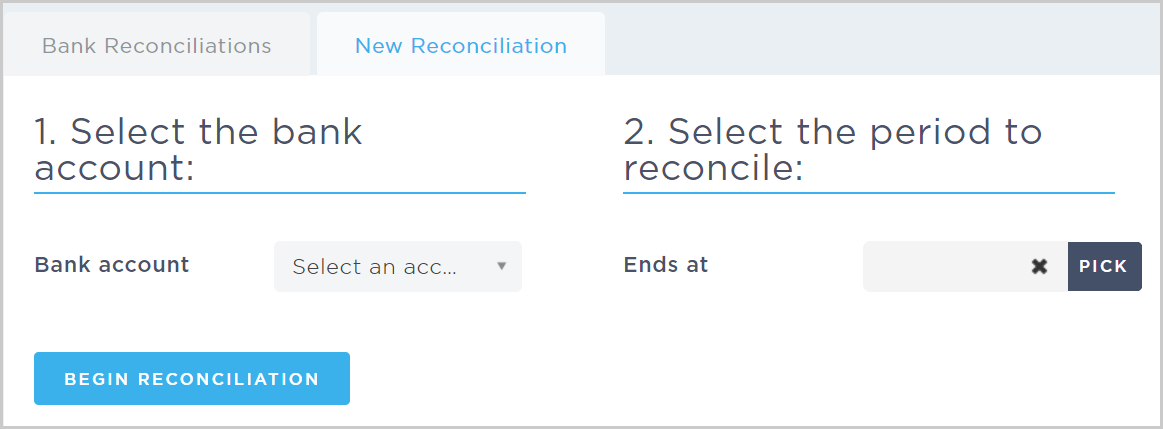
Create a bank reconciliation - Start a new reconciliation by selecting the bank account and the reconciliation period.
-
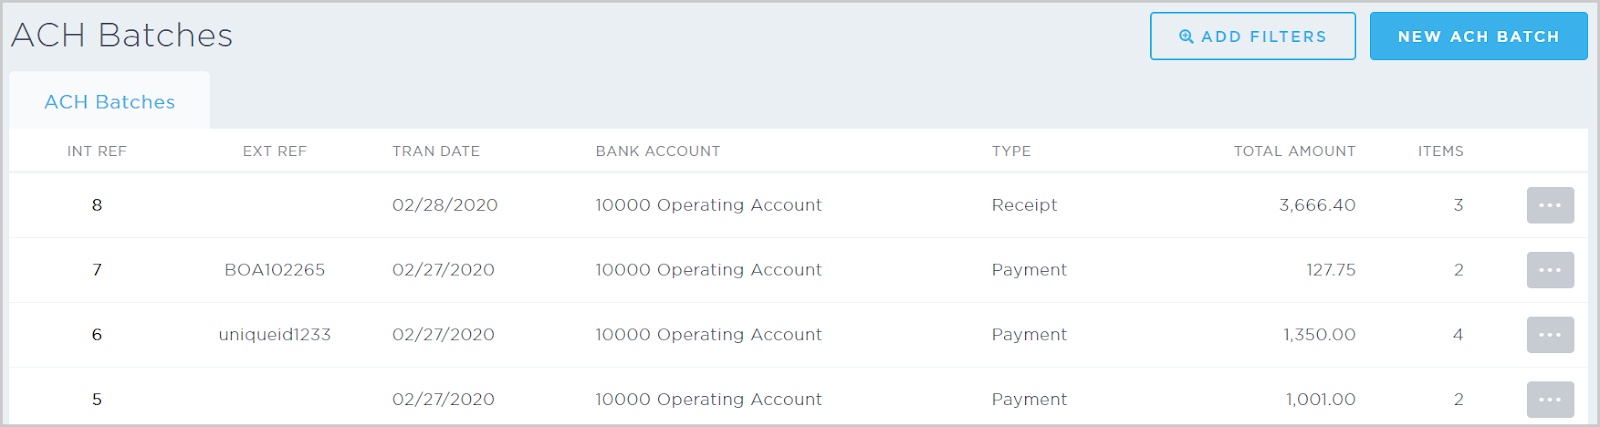
Browse & view ACH batches - View all ACH batches in the system. Click the Int Ref (internal reference) hyperlink to view a batch’s details. On the far right, you can click the ellipsis (...) to view a batch, edit a batch, or download the NACHA file. You can also filter by ID (internal or external) and created dates. To start a new ACH batch from this page, click New ACH Batch.For more details, see our articles on recording receipts and deposits, configuring banks and bank accounts, ACH batches and generating a NACHA files and performing bank reconciliations.
Suppliers
This subsection lets users view and add suppliers using the following options:
-
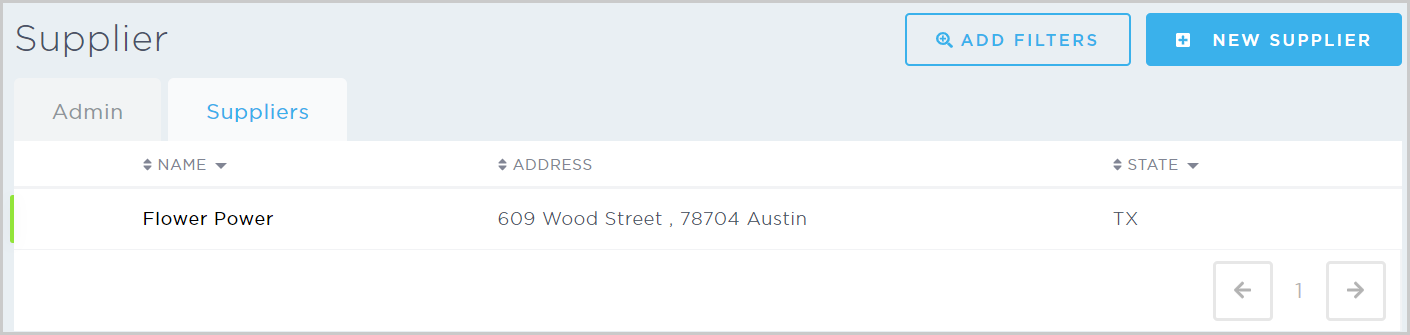
Browse, view & edit suppliers - View all suppliers configured in the system. From the Supplier page, you can click the Supplier name hyperlink to view the supplier’s details. You can also filter by status (inactive), name, and state. To add a new supplier from this page, click New Supplier.
-
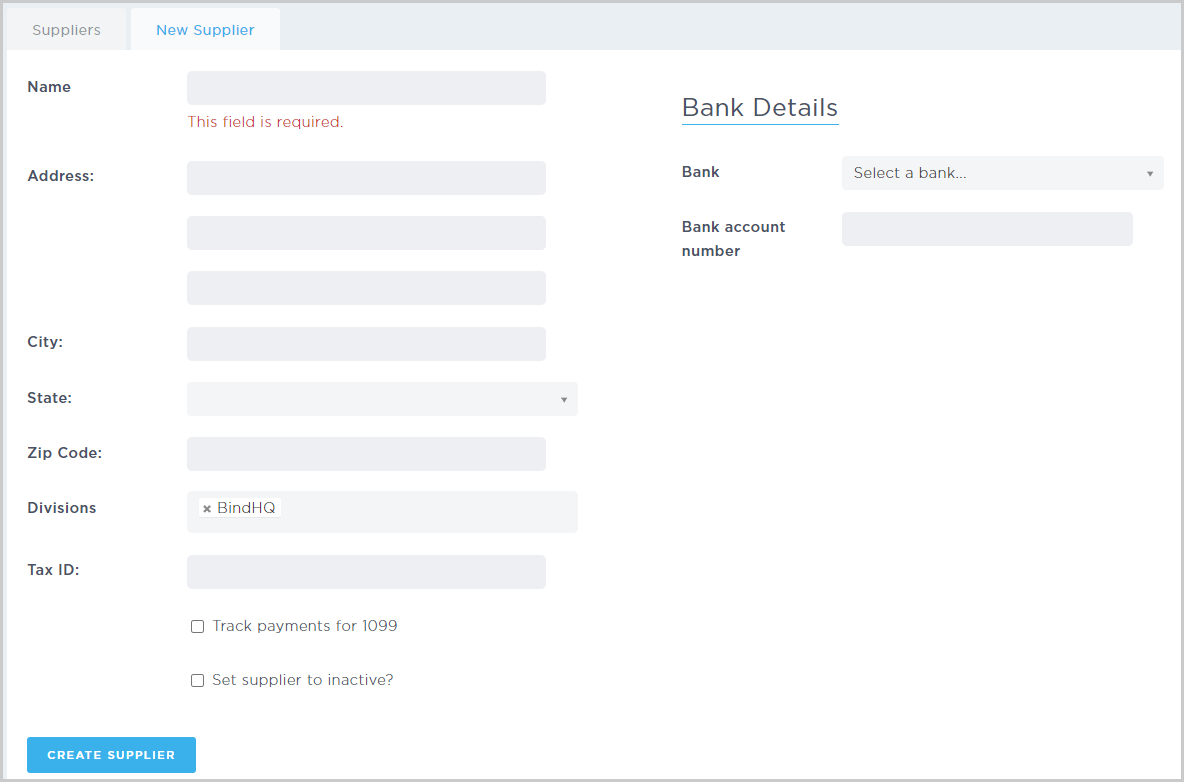
Add a new supplier - Create a new supplier by filling in the supplier details, including name (required), address, divisions, tax ID, and bank account number.
G/L Account Admin
This subsection lets users manage the chart of accounts using the following options:
-
Add a new account - Create a new GL account by filling in the account details, including number, name (required), description, type (for example, Bank), divisions, and parent account.
The supported Account Types are:
AssetBankOther Current AssetFixed AssetOther Asset
Accounts ReceivableUndeposited FundsEquityEquityRetained EarningsExpenseExpenseOther ExpenseCost Of Goods SoldLiabilityAccounts PayableOther Current LiabilityLong Term LiabilityRevenueIncomeOther Income
-
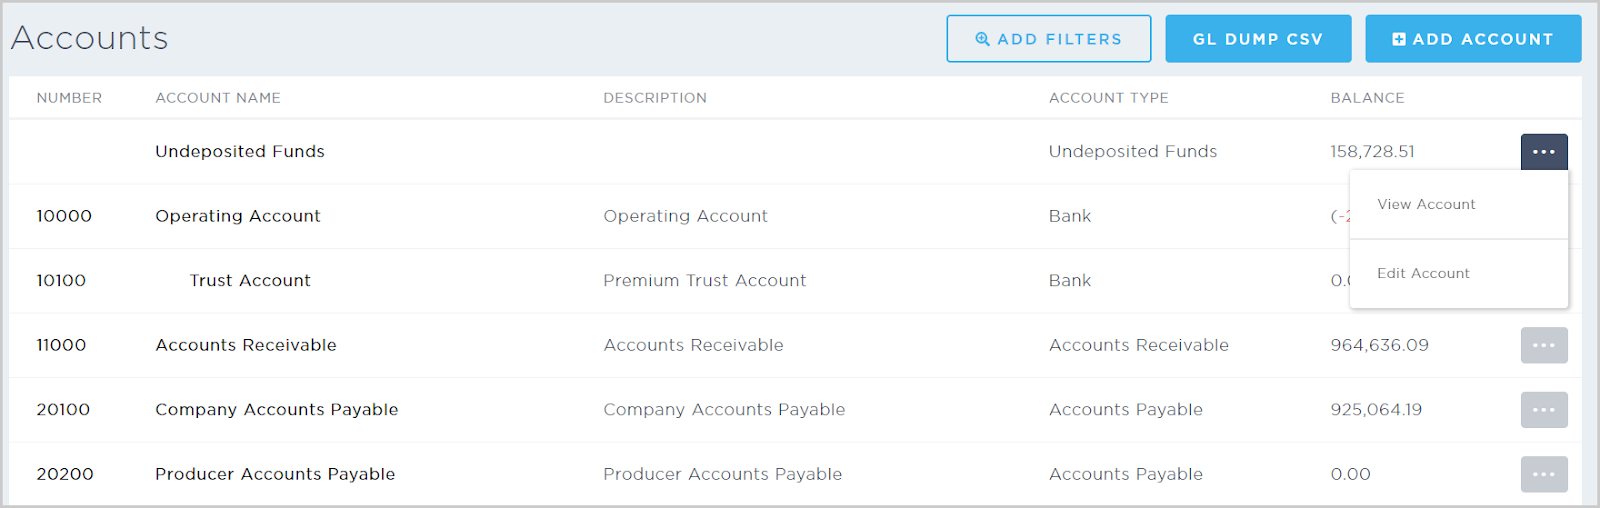
Browse & view accounts - View all GL accounts in the system. From the Chart of Accounts page, you can click the Number or Account Name hyperlinks. On the far right, you can click the ellipsis icon (...) to view or edit an account. You can also filter by name or account type. To request a GL dump, click GL Dump CSV. To add a GL account from this page, click Add Account.
-
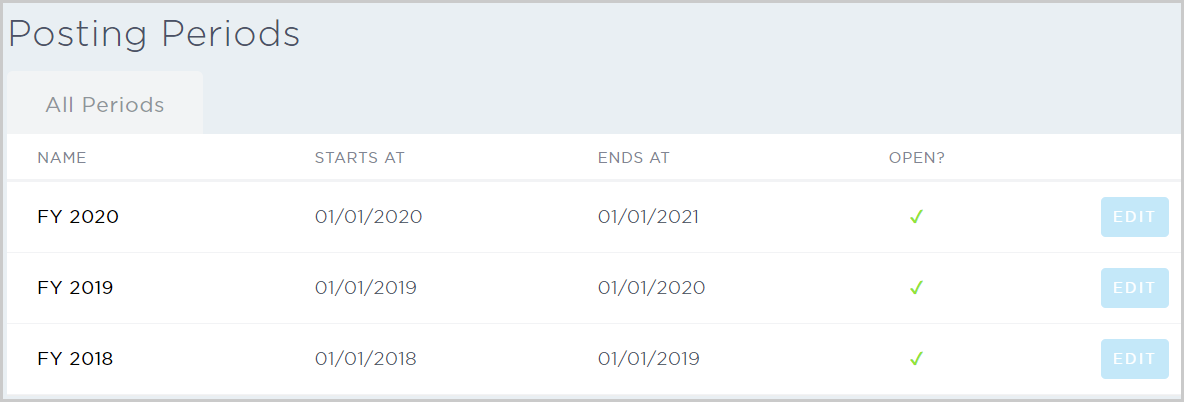
Browse, view & edit posting periods - View all posting periods in the system. From the Posting Periods page, you can click the Name hyperlink to view more posting details. On the far right, you can click Edit to close the posting period.