Using the Browse & Configure Bank Accounts Page
Last updated: July 5, 2025
You can use the Browse & Configure Bank Accounts page to configure bank accounts for your agency
Applies to:
- Accountants
- Accounting Assistants
Last Updated: December 2024
This article explains how you can browse and configure bank accounts for your agency.
You can access this page by navigating to the 'Accounting' tab in the sidebar, then selecting 'General', followed by 'Banks', and finally choosing 'Browse & Configure Bank Accounts' under the Bank tab.
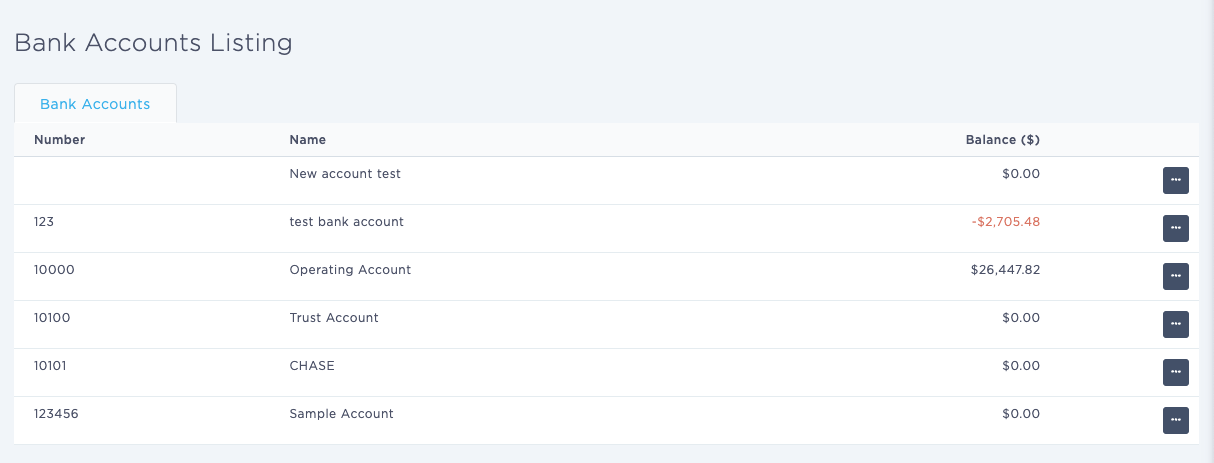
You can use this page to answer the following questions:
- What bank accounts are configured?
- What account within the chart of accounts does each bank account relate?
- What is the balance in each bank account?
The default Bank Accounts lists fields for account number, name, and balance.
You can edit the bank account details listed by clicking on the ellipsis icon ("...") on the right side of the UI.
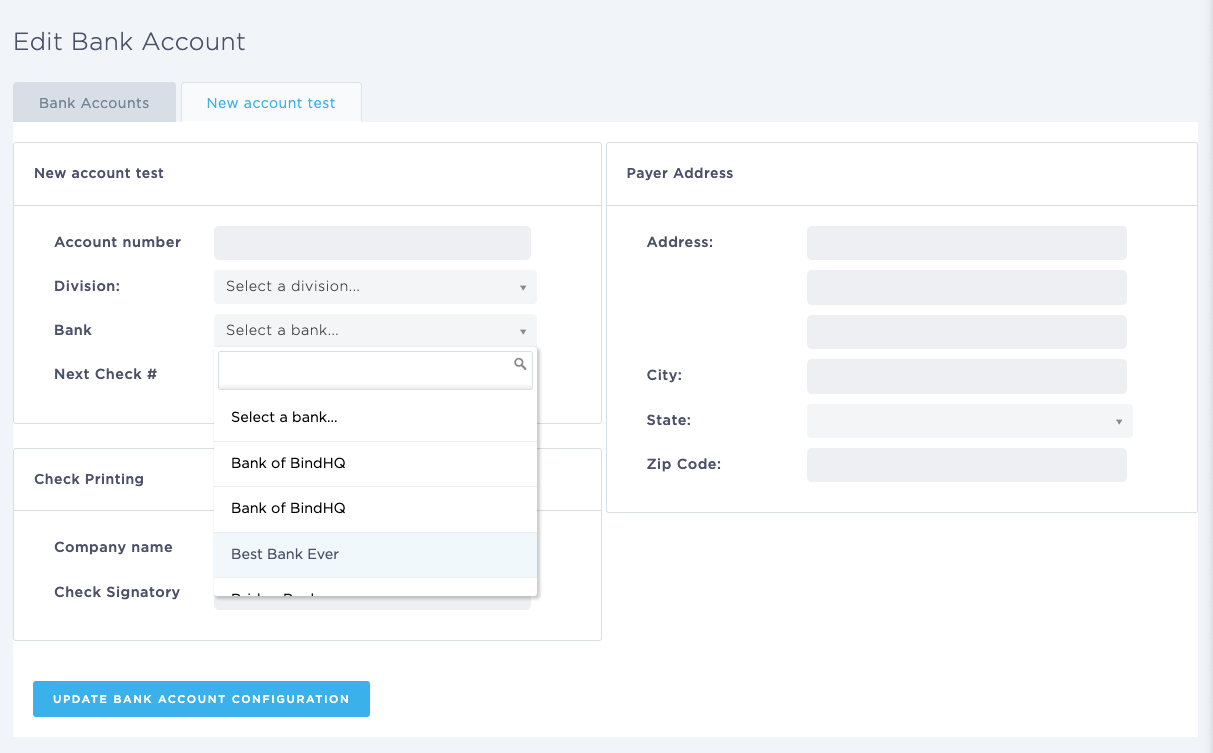
This will bring you to the bank account details page, where you can enter the following information:

- Account Details
- Account Number
- Division (if relevant)
- Bank - you can choose from list of Banks in the dropdown that have been saved and configured in BindHQ [See Browse & Configure Banks]
- Next Check # -
- Check Printing
- Company Name
- Check Signatory
- Payer Address
- Address
- City
- State
- Zip Code
You can save the settings by clicking on the blue button ‘Bank Account Configuration.‘